Image Effects
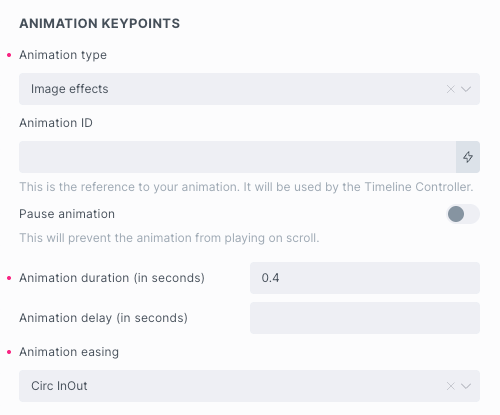
Image Effects are designed to allow you to apply one of the ready-made effects instantly, with as few settings required as possible.
Currently you can choose between Reveal and Parallax effect.
All the animation features normally available through the ‘From – To’ animation type can also be used in conjunction with Image Effects.
Prerequisites!
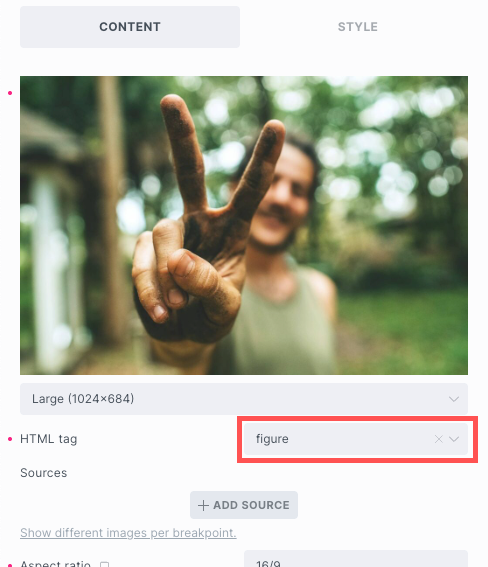
In order to make the Image effects function properly, you must provide the HTML tag element for the image!
Open the Content group and select one of the available HTML tags. Any available (or the custom one) will do just fine!
Image Reveal

The effect itself comprises two layers: the first one being the cover, and the other one being the image itself.
Once the animation is triggered, the two layers are supposed to be revealed at different speed rates, giving the impression of uncovering. You can control the speed offset, and it’s up to you to make it more or less apparent.
Reveal direction
The Reveal effect allows you to unveil (or unhide) the Image element from the top, right, bottom, or the left-hand side.
Technically, the effect is the same, but the difference lies in the side from which the image is being revealed.
Direction offset
You can think of an offset as the element’s START position. The END position will always be the element’s default/initial position.
For instance, if you have chosen Reveal from left, with a Direction offset of 5vw, the element will automatically include the animation along the X-axis from -5vw to 0 (zero).
The negative starting value is based on the chosen Reveal direction. The left-hand side is considered negative, while the right-hand side is positive. By following the same logic, the top is also considered negative, and the bottom direction is positive.
Entering a negative value is not recommended because it will be suppressed and cancel out the offset!
Speed offset
It has been mentioned that the effect itself comprises two layers: the first one being the cover, and the other one being the image itself. The two layers are meant to be revealed at different speed rates.
The Speed offset determines how long it takes for the image to catch up with the cover, measured in seconds.
For instance, if you set the Speed offset to 0.1, it means that it’ll take 0.1 seconds for the image to catch up.
Fade in?
Should the element fade from 0 (zero) to 1 as well? If enabled, the effect will include the animation of opacity too. Please note that the opacity affects both the cover and the image!
Image cover color
This option allows you to set the color of the image cover.
In case you dislike or don’t want to use the cover in general, keep this option unselected (clear the color).
Example
By words:
Whenever the top of the Image element hits the viewport’s center, reveal image from top.
Direction offset should be 20, the Speed offset is 0.1.
The animation should take 0.4 seconds to complete.
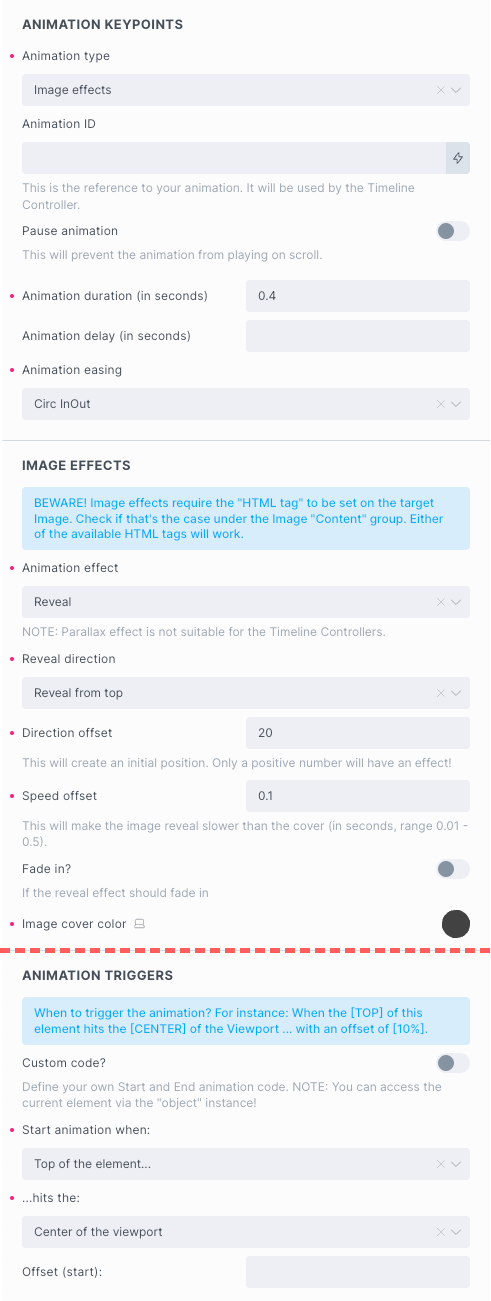
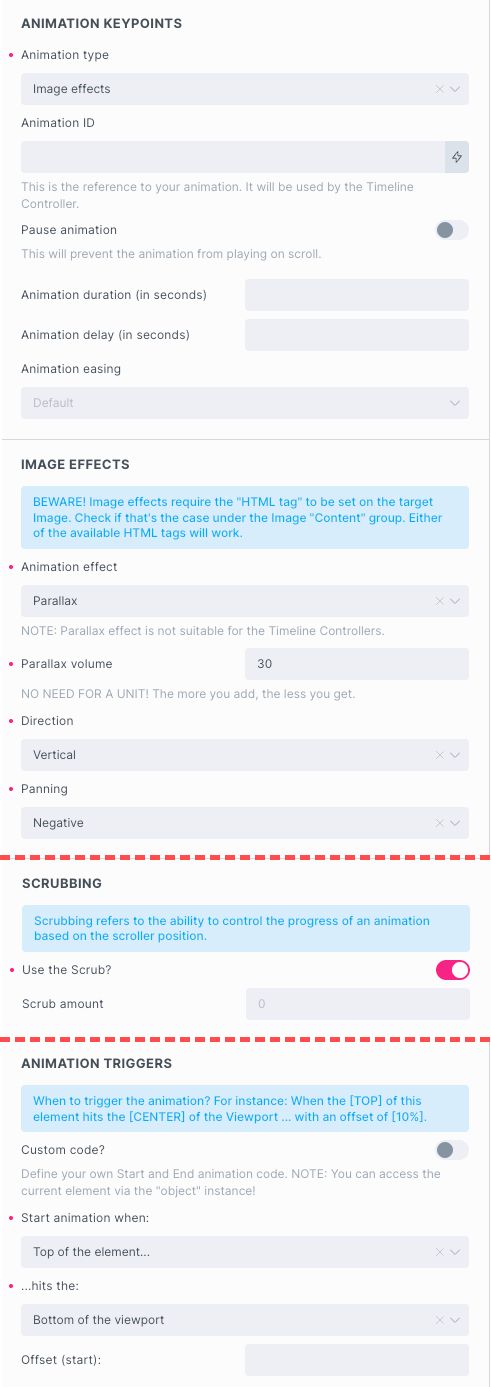
Image Parallax
Parallax effect provides an impression of an image moving at a different speed than the rest of the content as you scroll down the page.This creates an illusion of depth and makes the website feel more dynamic and three-dimensional.
Parallax volume
Represents the percentage to add atop the current image size which is always 100%.
If you want to scale the image up for 30%, you gonna enter “30” into the Parallax Volume input field which increases the image size to 130%, both horizontally and vertically.
“The more you add, the less you get” – the image is scaled up but at the same time parent element size doesn’t change. The greater the Parallax Volume, the less of the image remains visible.
Direction
The image parallax can be horizontal or vertical and is used to ‘pan’ the image in either direction as you scroll. Most likely, the vertical direction will be applied to portrait orientation images, while the horizontal direction is more suitable for landscape formats. Of course, that’s not a rule; you can use it at will.
Panning
You can think of it as revealing a portion of the image in the chosen direction while the page is being scrolled up or down.
Positive panning makes the image reveal/move alongside the X (horizontal) or Y (vertical) axis in the positive direction, while Negative panning does that in the opposite direction.
Example
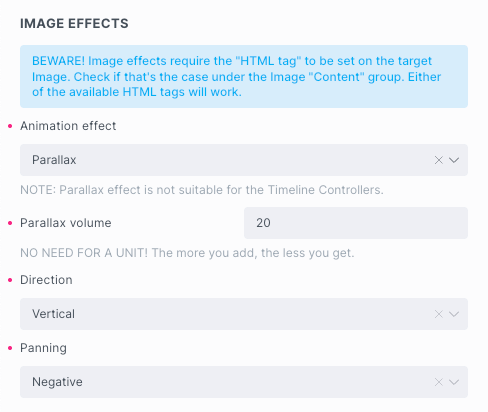
By words:
Whenever the top of the Image element hits the viewport’s bottom, start the scrolling parallax.
Parallax should be 30, the Direction is “Vertical”, and the Panning is set to “Negative”.
Scrubbing effect is enabled.