Animation PresetsNew
Presets in OB Kinekt are saved animation configurations that you can reuse across different pages and elements in your Bricks Builder website. Instead of recreating the same animation settings every time, you can save them as a preset and apply them instantly.
Core Methods
How Presets Work
🔶 Creating Your First Preset
- Edit any page with Bricks Builder
- Add or select an element (Heading, Text, Image, Container, etc.)
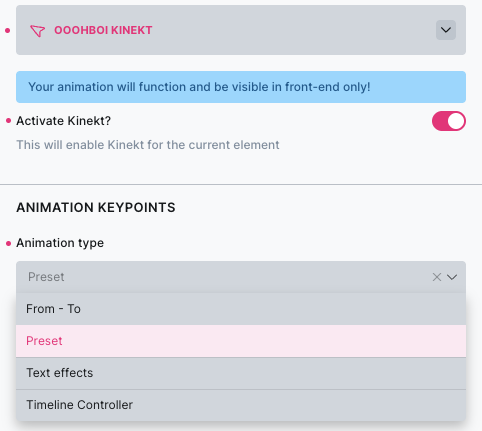
- Go to the Style tab and find the “OoohBoi Kinekt” panel
- Enable “Activate Kinekt?” and configure your animation:
- Choose animation type (From-To, Text Effects, Image Effects, SVG Line Effects)
- Set triggers, duration, easing, and other properties
- Configure any specific settings for your chosen animation type
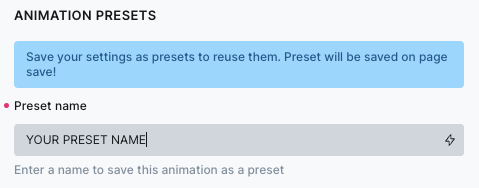
- Enter a Preset Name in the “Preset Name” field (at the very bottom of the panel)
- Save the page – your animation will be automatically saved as a preset
Managing Presets in WordPress Admin
🔶 Access your presets at: WordPress Admin → OB Kinekt → Presets

| Column Name | Description |
|---|---|
| Preset Name | The name you gave your preset |
| Animation Type | The type of animation (From-To, Text Effects, etc.) |
| Element Type | The Bricks element type (heading, text, image, etc.) |
| Created | When the preset was first created |
| Updated | Last time the preset was modified |
| Actions | Export and Delete buttons |
Export and Import Presets
🔶 Exporting Presets
Export Single Preset
- Find the preset in the table
- Click the “Export” button
- The preset will download as a .json file
Export All Presets
- Click “Export All” in the Import/Export section
- All presets download as a single
.jsonfile
🔶 Importing Presets
Import Single or Multiple Presets
- Click “Choose File” in the Import section
- Select your .json file
- Click “Import”
Import Results
After import, you’ll see:
- Added: New presets that were imported
- Updated: Existing presets that were updated
- Skipped: Presets that couldn’t be imported
- Using Presets in Your Designs
🔶 Method 1: Load Existing Preset
- Add any element in Bricks Builder
- Go to Style tab → “OoohBoi Kinekt” panel
- Enable “Activate Kinekt?”
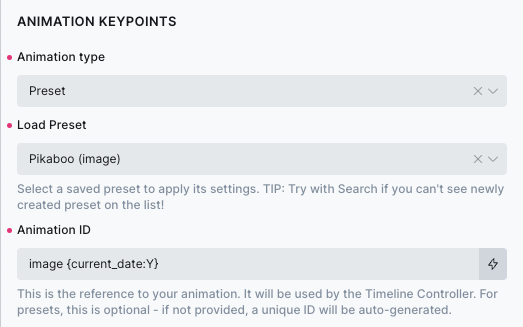
- Change Animation Type to “Preset”
- Select your preset from the dropdown
- The animation loads instantly!
NOTE: If the preset you created doesn’t show up on the list immediately, use the search from the list top!

Preset “Animation ID”
Since OB Kinekt version 2.1.3 presets are pure animation templates without embedded IDs! Users can optionally assign a unique Animation ID to that specific preset instance. It means that the Animation ID is being removed from preset storage. This involves changes to preset creation, export, import, and admin UI.
Dynamic data support
- {post_id} → resolves to current post ID
- {echo:myFunction()} → executes custom PHP function
- My animation {post_id} → resolves to “My animation POST_ID”
- {acf_field_name} → resolves to ACF field value
- Any other Bricks dynamic data tag
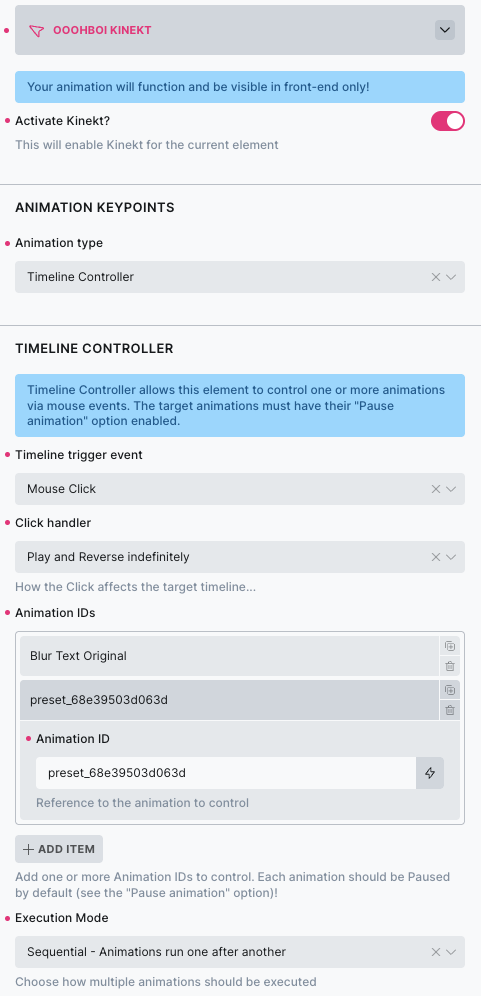
🔶 Method 2: Timeline Controller
Use presets with the Timeline Controller for advanced animation control:
- Add a Timeline Controller element (almost any element can be a controller)
- Configure it to trigger your preset animations
- Set execution mode: Simultaneous or Sequential
- Choose trigger event: Click or Hover
❗️Element Type Awareness
Presets work best when used with matching element types:
- Text presets → Heading, Text elements
- Image presets → Image elements
- Layout presets → Container, Section elements
❗️Preset Limitations
- 50 preset limit – older presets are automatically cleaned up
- Animation ID consistency – required for Timeline Controller — NOTE: A preset CAN HAVE only 1 unique animation ID
- Element compatibility – some animations work better with specific element types